13 Aug 2016
Perhaps you read the blog post Build a DNS server on NetBSD.
This is essentially the same thing except I use debian this time. The idea behind this is if one system goes down the other
one should be running. So basically diversity for zero DNS downtime. (There will be a third blog post with images of the hardware I used)
I used the raspbian lite image from the official raspberrypi site.
So as always unzip it and dd it to the right sd card.
$ unzip 2016-05-27-raspbian-jessie-lite.zip
$ sudo dd if=2016-05-27-raspbian-jessie-lite.img of=/dev/sde
2709504+0 records in
2709504+0 records out
1387266048 bytes (1.4 GB) copied, 169.065 s, 8.2 MB/s
Now you can start your pi and login in with user:pi & password:raspberry.
It's highly recommended to change your password with passwd. Also always
a good idea is to upgrade your system.
apt-get update && apt-get upgrade
Configure a static IP on your interface:
$ cat /etc/dhcpcd.conf
# A sample configuration for dhcpcd.
# See dhcpcd.conf(5) for details.

noarp

interface eth0
static ip_address=192.168.17.6/24
static routers=192.168.17.1
Now we are ready to install dnsmasq
sudo apt-get install dnsmasq
We can use now the exact same config files as in the previous post.
/etc/dnsmasq.conf
# Change this line if you want dns to get its upstream servers from
# somewhere other that /etc/resolv.conf
resolv-file=/etc/resolv.conf.dnsmasq

# Add other name servers here, with domain specs if they are for
# non-public domains.
server=/XXXX.loc/192.168.XXX.XXX

# Add local-only domains here, queries in these domains are answered
# from /etc/hosts or DHCP only.
local=/l33t.network/

# Set the cachesize here.
cache-size=500
/etc/resolv.conf.dnsmasq
nameserver 85.214.73.63
nameserver 208.67.222.222
nameserver 62.141.58.13
/etc/hosts
#  = IP =       =  Domainname =               = PC name =
192.168.17.1     pandora.l33t.network          pandora
192.168.17.5     janus.l33t.network            janus
192.168.17.30    atlas.l33t.network            atlas
The only thing that slightly changes is the path of the first config file.
Side note since I use a resolv-file you need for some reasons also
edit /etc/default/dnsmasq and uncomment this line: IGNORE_RESOLVCONF=yes.
Now you can restart dnsmasq and your DNS server is ready to use.
10 Jul 2016
I run localy a dnsmasq server as my primary DNS server. This has two main
reasons the first one is that it's really simple and small. Secondly it's platform indipenden, meaning
I can run it on my NetBSD but also on my FreeBSD or even on linux. This means also I can just reuse the same config files.
Let's get started you need the right NetBSD image for your Raspberry Pi, if I'm not mistaken
it should be evbarm-earmv6hf for a Raspberry Pi 1 and evbarm-earmv7hf for the newer ones (Raspberry Pi 2 & 3).
Here is how to download it and flash it to your SD card.
Warning: as always double check that you are flashing your SD card and not something else!
wget https://cdn.netbsd.org/pub/NetBSD/NetBSD-8.0/evbarm-earmv7hf/binary/gzimg/armv7.img.gz
gunzip rpi.img.gz
sudo dd if=rpi.img of=/dev/sdX
And thats all preparation needed, now you can plug a keyboard, ethernet, the SD card and HDMI cable in your
Raspberry Pi and power it up. Then you just need to wait until the system has resized the root filesystem and
prepared everything else.
The first thing you should do is to login as root and set a password for the root account.
After that you can add a user like this (the wheel group is necessary to use su later):
useradd -m -G wheel l33tname
passwd l33tname
Also recomended is to edit /etc/rc.conf I changed the hostname and configured a static ip, meaning disable
dhcpcd. Here are the important bits:
hostname=janus
ifconfig_usmsc0="192.168.17.5 netmask 0xffffff00"
defaultroute=192.168.17.1
#dhcpcd=YES
sshd=YES
After a reboot you should be able to login with your new user over ssh.
Now you need time, downloading and unpacking or a cvs checkout of all ports take some time on a
old Raspberry Pi.
Using the cvs source:
cd /usr && cvs -q -z2 -d anoncvs@anoncvs.NetBSD.org:/cvsroot checkout -P pkgsrc
Or download the tar archive:
ftp ftp://ftp.netbsd.org/pub/pkgsrc/pkgsrc-2016Q2/pkgsrc.tar.gz
su
tar -xzf pkgsrc.tar.gz -C /usr
I use cvs because you can update it with:
cd /usr/pkgsrc && cvs update -dP
But read Where to get pkgsrc and how to keep it up-to-date for
more informations.
With the pkgsrc in place we can compile and install dnsmasq.
cd /usr/pkgsrc/net/dnsmasq
make
make install
cp /usr/pkg/share/examples/rc.d/dnsmasq /etc/rc.d/
The configuration is simple you only need 3 files. The first one is the main configuration which
is located in /usr/pkg/etc/dnsmasq.conf
# Change this line if you want dns to get its upstream servers from
# somewhere other that /etc/resolv.conf
resolv-file=/etc/resolv.conf.dnsmasq

# Add other name servers here, with domain specs if they are for
# non-public domains.
server=/XXXX.loc/192.168.XXX.XXX

# Set the cachesize here.
cache-size=500
As you can see the dns upstream servers are configured in /etc/resolv.conf.dnsmasq I'm using
these serveres, but feel free to use any other dns server you trust.
nameserver 85.214.73.63
nameserver 208.67.222.222
nameserver 62.141.58.13
And last but not least the /etc/hosts file where you now can add all your hosts.
#  = IP =       =  Domainname =               = PC name =
192.168.17.1     pandora.l33t.network          pandora
192.168.17.5     janus.l33t.network            janus
192.168.17.30    atlas.l33t.network            atlas
And that's it you are almost finished with configure your dnsmasq, the last thing is obviously
to start the deamon and test it. So add "dnsmasq=YES" it to /etc/rc.conf and start it with service dnsmasq start.
Test it with somethin like dig:
$ dig pandora @192.168.17.5 | grep pandora
; <<>> DiG 9.10.3-P4-RedHat-9.10.3-9.P4.fc22 <<>> pandora @192.168.17.6
;pandora.			IN	A
pandora.		0	IN	A	192.168.17.1
06 May 2016
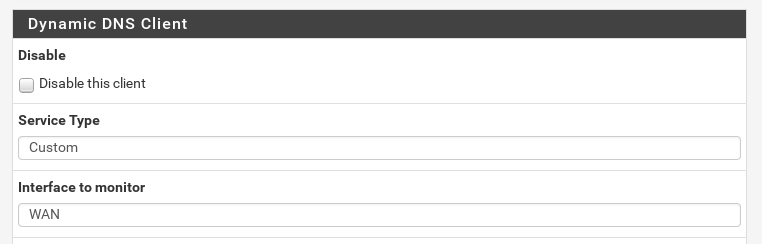
I use pfSense on my primary home router. And it's awesome! If you haven't tried it, you should absolutely https://www.pfsense.org/.
It's based on FreeBSD and since the last update to 2.3.0 it even looks nice. Because my internet provider doesn't provide a static
IP I use Dynamic DNS. Dynamic DNS is a thing which describes the process of a client with a changing IP keeping a DNS record up to date.
This means every time the client IP changes the client triggers an update of the DNS record for it. With this in place you can access your
home network always over something like dyndns.mydomain.tdl.
I thought it would be easy to setting this up for my home network, well I was wrong. It should be simple pfSense suports DDNS out of the box
Dynamic DNS. And my domain provider has a page which describes how their
DDNS API works: ddns dynamic dns service on your own domain.
So I filled out the DDNS page and it just didn't work. And the advance login is not helpful at all.
That is why I added a bit logging code to /etc/inc/dyndns.class to see what curl does. The result was something like this:
*   Trying 45.55.114.21...
* Connected to iwantmyname.com (45.55.114.21) port 443 (#0)
* Initializing NSS with certpath: sql:/etc/pki/nssdb
*   CAfile: /etc/pki/tls/certs/ca-bundle.crt
  CApath: none
* SSL connection using TLS_ECDHE_RSA_WITH_AES_256_CBC_SHA
* Server certificate:
* 	subject: CN=iwantmyname.com,O=iwantmyname (ideegeo group Ltd),L=Wellington,ST=Wellington,C=NZ,postalCode=6011,STREET=167b Vivian Street,STREET=Te Aro,serialNumber=2131522,incorporationCountry=NZ,businessCategory=Private Organization
* 	start date: Apr 10 00:00:00 2015 GMT
* 	expire date: Apr 25 12:00:00 2017 GMT
* 	common name: iwantmyname.com
* 	issuer: CN=DigiCert SHA2 Extended Validation Server CA,OU=www.digicert.com,O=DigiCert Inc,C=US
> GET /basicauth/ddns?hostname=dyndns.domain.tdl&myip=151.XXX.XXX.XXX HTTP/1.1
> User-Agent: curl/7.40.0
> Host: iwantmyname.com
> Accept: */*
>
< HTTP/1.1 403 Forbidden
< Server: nginx
< Date: Sun, 01 May 2016 09:45:59 GMT
< Content-Type: text/plain; charset=UTF-8
< Content-Length: 8
< Connection: keep-alive
< Set-Cookie: iregistrar_session=1234; path=/; expires=Sun, 01-May-2016 10:15:59 GMT; secure; HttpOnly
< Set-Cookie: csrf_session=1234; path=/; HttpOnly
<
* Connection #0 to host iwantmyname.com left intact
And the response was badauth., so I double checked my username and password but it still didn't work.
The next thing was to recreate this error with curl. For that I checked which arguments are used in the code.
case 'custom':
case 'custom-v6':
        if (strstr($this->dnsUpdateURL, "%IP%")) {$needsIP = TRUE;} else {$needsIP = FALSE;}
        if ($this->_dnsUser != '') {
                if ($this->_curlIpresolveV4) {
                        curl_setopt($ch, CURLOPT_IPRESOLVE, CURL_IPRESOLVE_V4);
                }
                if ($this->_curlSslVerifypeer) {
                        curl_setopt($ch, CURLOPT_SSL_VERIFYPEER, TRUE);
                } else {
                        curl_setopt($ch, CURLOPT_SSL_VERIFYPEER, FALSE);
                }
                curl_setopt($ch, CURLOPT_HTTPAUTH, CURLAUTH_ANY);
                curl_setopt($ch, CURLOPT_USERPWD, "{$this->_dnsUser}:{$this->_dnsPass}");
        }
        $server = str_replace("%IP%", $this->_dnsIP, $this->_dnsUpdateURL);
        if ($this->_dnsVerboseLog) {
                log_error(sprintf(gettext("Sending request to: %s"), $server));
        }
        curl_setopt($ch, CURLOPT_URL, $server);
        break;
And as you can see in this snipped it's something like this:
$ curl -vv --anyauth "https://iwantmyname.com/basicauth/ddns?hostname=dyndns.domain.tdl&myip=151.XXX.XXX.XXX"
I recreated the error, this was when I figured out that there is no Authentication header in my request. And
now it makes totally sense that my response is badauth, because there is no authentication. The question is now
what does --anyauth. For that I consulted the man page
Tells curl to figure out authentication method by itself, and use the most secure one the remote site claims to support.
This is done by first doing a request and checking the response-headers, thus possibly inducing an extra network round-trip.
This sounds cool but as you can see in the log I don't get a response with a 401 status code and which authentication method are
supported, I just get an 403 Forbidden. Expected would be something like this:
< HTTP/1.1 401 Unauthorized
< Content-Length: 757
< Vary: Accept-Encoding
< Server: nginx
< Date: Fri, 06 May 2016 11:04:43 GMT
< Content-Type: text/html;charset=utf-8
< Www-Authenticate: Basic realm="iwantmyname simple api"
So as a quick fix I just changed
curl_setopt($ch, CURLOPT_HTTPAUTH, CURLAUTH_ANY);
to
curl_setopt($ch, CURLOPT_HTTPAUTH, CURLAUTH_BASIC);
Which works fine. Since now the Basic Authentication is added to the first request. Which looks then like this:
* Server auth using Basic with user 'username'
> GET /basicauth/ddns?hostname=dyndns.domain.tdl&myip=151.XXX.XXX.XXX HTTP/1.1
Host: iwantmyname.com
Authorization: Basic 1234=
For the long term I hope iwantmyname will fix their API. (I will probably update this blog post if that happens).
Update
They fixed it!
04 Jan 2016
I upgraded my system disk from a SSD to a PCI SSD. Mostly because the Dell T20 has only 4 SATA
ports. So I bought a 'DeLock PCI-Express-x4 Kontroller' and a 'Samsung 850 EVO M.2'. Which was not the smartest choice because there are two types
of M.2 SSDs some have a PCI interface and others have a SATA interface and you need the ones with PCI. That is why I bought a few days later a
'Samsung SSD SM951 128GB Workstation' which worked as expected, well almost. The card should work with out drivers and it should be possible to boot
from it. And here comes the fun part of course I couldn't boot from it, so I had the smart idea it should be easy to bootstrap my FreeBSD from a USB drive
and then boot from the PCI SSD card. And here is how you can do it:
First of all you should know the name of your devices (you can use something like camcontrol devlist) in my case:
USB drive: da1
PCI SSD: ada0
Now we can delete all data and partitions on these two devices. This assumes
of course that you don't have any data you need on it. And I would recommend to disconnect and backup all disk you also
have connected to your Server. It's just to easy to wipe the wrong disk or copy things in the wrong partition. If you losing any data
it's not my fault! That said here is how to clean out the old partition and create the new ones.
# clean out old partitions
gpart destroy -F da1
gpart destroy -F ada0

# create partitions
gpart create -s gpt da1
gpart create -s gpt ada0

gpart add -a 4k -s 512K -t freebsd-boot da1
gpart add -a 4k -t freebsd-zfs da1

gpart add -a 4k -s 4G -t freebsd-swap ada0
gpart add -a 4k -t freebsd-zfs ada0
With that out of the way we can copy the boot code to the USB drive.
gpart bootcode -b /boot/pmbr -p /boot/gptzfsboot -i 1 da1
The next step is to create the the zfs pools and datasets for a FreeBSD install.
# create pools
zpool create -o altroot=/mnt -o cachefile=/tmp/zpool.cache usbboot /dev/da1p2
zpool create -o altroot=/mnt -o cachefile=/tmp/zpool.cache ssdboot /dev/ada0p2

zfs set mountpoint=none usbboot
zfs set mountpoint=none ssdboot

zfs set checksum=fletcher4 usbboot
zfs set checksum=fletcher4 ssdboot


# create datasets
zfs create -o mountpoint=none ssdboot/ROOT
zfs create -o mountpoint=/ ssdboot/ROOT/default
zfs create -o mountpoint=/home ssdboot/home
zfs create -o mountpoint=/usr ssdboot/usr
zfs create -o mountpoint=/var ssdboot/var
zfs create -o mountpoint=/tmp ssdboot/tmp

chmod 1777 /mnt/tmp

zfs create -o mountpoint=/uboot -o compression=off usbboot/boot
zpool set bootfs=usbboot/boot usbboot


zpool import -f -R /mnt usbboot
or
zfs mount


zpool set bootfs=none ssdboot
After all this we can finally copy the FreeBSD files to the file system.
cd /usr/freebsd-dist
for i in base kernel src ports games lib32; do
xz -d -c $i.txz | tar -C /mnt -xf -
done

chroot /mnt
touch /etc/rc.conf
touch /etc/fstab
touch /boot/loader.conf
Before we can reboot we need to configure a few settings in various files. This should load your FreeBSD from the SSD and mount your swap.
# /etc/rc.conf
zfs_enable="YES"

# /boot/loader.conf
zfs_load="YES"
vfs.root.mountfrom="zfs:ssdboot/ROOT/default"

# /etc/fstab
/dev/ada0p1    none    swap    sw    0    0
As a last step we need to copy /boot on the USB drive.
mkdir /mnt/uboot/boot
cp -r /boot/* /mnt/uboot/boot/
cp /tmp/zpool.cache /mnt/uboot/boot/zfs/
Now is the time to reboot an pray, if everything worked it should boot FreeBSD.
If everything works we can symlink the boot directory.
rm -rf /boot/
ln -s /uboot/boot /boot
This works except one thing somehow it forgets after a reboot which pools are mounted. So after every reboot
I mount my pools manually.
sudo zpool import usbboot
sudo zpool import tank
sudo ezjail-admin start
This is not as bad as it sounds since I only reboot for kernel updates but if you know why this happens or
how to fix it, there is a FreeBSD forums thread for it.
You can also contact me directly over mail, twitter whatever.
18 Oct 2015
I'm a huge fan of the Chromecast, the small streaming dongle from google. And I already wrote about the
first version here: Chromecast. There where always rumours
that a Chromecast 2 is around the corner. And now it happened. They have finally presented one with features
I'm waiting since I bought the first one. Mostly 5ghz WLAN, I don't understand why the first Chromecast
was lacking this.

I use my Chromecast mostly for three apps: BeyondPod (which is the best podcast client on android), Plex (self hosted netflix)
and YouTube (a platform for videos, you know that, right?). And these are the three apps I tested with the new Chromecast.
Nothing really surprising but all these apps are much smother to use, which is cool. Also nice was the on-boarding experience.
New is the Chromcast Audio, which is at least for me not that exciting. But this is
probably because I already have a Sonos sound system and I build something quite similar called Radio Pi.
But interesting is the price point it's much cheaper than Sonos and even cheaper than a self build solution with a Raspberry Pi.
So if you have already a Chromecast there is no real reason to upgrade, but it's a nice to have. If you haven't one it's a good
time to buy one.