28 Jan 2023
I got a good deal on a 18TB Harddisk.
Which was reason enough to rethink my backup setup.
Until now I used a push strategy where the system pushed the backup
to my backup system. (see blog post for reference Zfs Remote Backups)
This will change today!
The new strategy is that my backup system will pull the data itself.
This has a few advantages and makes it harder to if the main system
is compromised to compromise the backup.
I will also replace the shell scripts with sanoid or actually with syncoid.
For snapshots I continue to use zfstool.
The New Setup
On the system which should be backuped we need to install sanoid and add a user
with ssh key and minimal permissions.
# Install package
pkg install sanoid

# Add user
pw user add -n backup -c 'Backup User' -m -s /bin/sh

# Setup SSH with key
mkdir /home/backup/.ssh
echo "ssh-ed25519 AAA...jaM0 foo@bar.example" > /home/backup/.ssh/authorized_keys
chown -R backup:backup /home/backup/.ssh
chmod 700 /home/backup/.ssh
chmod 600 /home/backup/.ssh/authorized_keys

# Give access to the ZFS pools for the new user
zfs allow -u backup aclinherit,aclmode,compression,create,mount,destroy,hold,send,userprop,snapshot tank
zfs allow -u backup aclinherit,aclmode,compression,create,mount,destroy,hold,send,userprop,snapshot zroot
As for the system which should pull the datasets.
We also install sanoid and add a small script to our crontab
which does all the magic and pulls all datasets we want to backup.
It also pushes the status to influx so alerting and graphing can be done.
(Careful with the script there are some things you need to update for your usecase!)
# Install package
pkg install sanoid

# Put script in crontab
$ crontab -l
13       0 * * 7	/root/backup.sh
The /root/backup.sh script:
#!/bin/sh

REMOTE='backup@hostname-or-ip'
KEY='/root/.ssh/backup-key'
lockfile='/tmp/backup.pid'
logfile=/var/log/backup/hostname_log.txt

mkdir -p $(dirname $logfile)

if [ ! -f $lockfile ]
then
    echo $$ > $lockfile
else
    echo "$(date): early exit ${lockfile} does exist previous backup still running" | tee -a $logfile
    exit 13
fi

# Backup a ZFS dataset by pulling it
# localhost is the host where this scripts runs,
# where as remote is the host which should get backuped
# $1: name of the dataset on the remote host
# $2: name of the dataset on the local host
# return: a status code, 0 if successful
backup_dataset() {
    remote_ds=$1
    local_ds=$2

    syncoid --sshkey=${KEY} --recursive --no-privilege-elevation ${REMOTE}:${remote_ds} ${local_ds} >> /tmp/raw_backup.log 2>&1
    code=$?

    echo "$(date): pulling ${remote_ds} -> ${local_ds} exit code was: ${code}" >> $logfile
    echo $code
}

start=$(date +%s)
echo "$(date): backup started (log: $logfile)" | tee -a $logfile

exit_code=0
exit_code=$((exit_code + $(backup_dataset 'tank/backup' 'tank/backup')))
exit_code=$((exit_code + $(backup_dataset 'tank/data' 'tank/data')))
exit_code=$((exit_code + $(backup_dataset 'tank/music' 'tank/music')))
exit_code=$((exit_code + $(backup_dataset 'tank/photography' 'tank/photography')))
exit_code=$((exit_code + $(backup_dataset 'tank/podcast' 'tank/podcast')))
exit_code=$((exit_code + $(backup_dataset 'zroot/iocage' 'tank/iocage')))
exit_code=$((exit_code + $(backup_dataset 'zroot/usr/home' 'tank/hostname-home')))

end=$(date +%s)
runtime=$((end-start))
echo "$(date): exit code: ${exit_code} script ran for ~$((runtime / 60)) minutes ($runtime seconds)" | tee -a $logfile

curl -i -XPOST -u mrinflux:password 'https://influx.host.example:8086/write?db=thegreatedb' \
        --data-binary "backup,host=hostname.example status=${exit_code}i
        backuptime,host=hostname.example value=${runtime}i"

rm -f $lockfile
exit $exit_code
26 Dec 2022
Wouldn't it be fun if your singleton exist multiple times?
The answer is yes! (Unless you need to debug it or when it actually needs to work)
Lets take a closer look at the situation:
┌─────────────────────────────────────────────────────────────────────────┐
│                                                                         │
│                            Application                                  │
│                                                                         │
│                             ┌───────────────────────────────────────┐   │
│                             │                                       │   │
│                             │ dynamic loaded library                │   │
│                             │ (Plugin)                              │   │
│                             │                                       │   │
│                             │                                       │   │
│                             │                                       │   │
│  ┌──────────────────────┐   │              ┌─────────────────────┐  │   │
│  │ shared library A     │   │              │ shared library A    │  │   │
│  │                      │   │              │                     │  │   │
│  │ [Singleton]          │   │              │ [Singleton]         │  │   │
│  │                      │   │              │                     │  │   │
│  └──────────────────────┘   │              └─────────────────────┘  │   │
│                             │                                       │   │
│                             └───────────────────────────────────────┘   │
│                                                                         │
└─────────────────────────────────────────────────────────────────────────┘
The application loads dynamically a library (basically a plugin) which was built using the shared library.
The shared library is where the singleton exists.
The same shared library is used directly in the app.
Meyer's singleton
Lets take a simple Meyer's singleton implementation.
#pragma once
#include <string>

struct Simpleton {
    static Simpleton& GetInstance();
    std::string value{"simple"};

    Simpleton() = delete;
    Simpleton &operator=(Simpleton&&) = delete;
};
If we create a small test inside our main app where we access the singleton inside the app and
inside the dynamic loaded library.
{
    cout << "Simpleton:\n";

    auto* simple_instance = reinterpret_cast<void const*(*)()>(dlsym(plugin_handle, "simple_instance"));
    auto* simple_get = reinterpret_cast<std::string(*)()>(dlsym(plugin_handle, "simple_get"));
    auto* simple_set = reinterpret_cast<void(*)(std::string)>(dlsym(plugin_handle, "simple_set"));

    cout << " app=" << &Simpleton::GetInstance() << " plugin=" << simple_instance() << '\n';
    cout << " value=" << Simpleton::GetInstance().value << " get=" << simple_get() << '\n';
    simple_set("updated simple value");
    cout << " value=" << Simpleton::GetInstance().value << " get=" << simple_get() << '\n';
}
We expect that the address of &Simpleton::GetInstance() and simple_instance() is the same.
And after setting the singleton via the plugin we expect the value readout in the app to reflect the changed value.
Otherwise it is not really a singleton.
If we check the output that is what happens.
Simpleton:
 app=0x7fa0bf373160 plugin=0x7fa0bf373160
 value=simple get=simple
 value=updated simple value get=updated simple value
Singleton Template
Check out the last blog post about the singleton pattern as a base for this singleton.
There is a small issue with this approach.
The template works great in almost all situations,
except when you need access to the singleton inside a library.
What happens when we use our fun singleton implementation.
{
    cout << "ConcreteSingleton:\n";

    auto* instance = reinterpret_cast<void const*(*)()>(dlsym(plugin_handle, "instance"));
    auto* get = reinterpret_cast<std::string(*)()>(dlsym(plugin_handle, "get"));
    auto* set = reinterpret_cast<void(*)(std::string)>(dlsym(plugin_handle, "set"));

    cout << " app=" << &ConcreteSingleton::GetInstance() << " plugin=" << instance() << '\n';
    cout << " value=" << ConcreteSingleton::GetInstance().value << " get=" << get() << '\n';
    set("updated value");
    cout << " value=" << ConcreteSingleton::GetInstance().value << " get=" << get() << '\n';
}
We would expect the same behavior as for our Meyer's singleton.
ConcreteSingleton:
 app=0x1ccf350 plugin=0x1ccf380
 value=default get=default
 value=default get=updated value
Ups. Seems like the plugin and our app are using different singletons.
If you use google to figure out what is happening here lets turn to google.
There is this very unhelpful comment from code review.
When working with static and shared libraries,
one must be careful that you don't have several implementations of the instance() function.
That would lead to hard to debug errors where there actually would exist more than one instance.
To avoid this use an instance function inside a compilation unit (.cpp) and not in a template from a header file.
source: https://codereview.stackexchange.com/a/222755
Otherwise I drew blank in searching for the issue.
Which was the main motivation to create this blog post with actual demo code.
A solution
It seems like the issue is that _instance is defined inside the header.
template <class T> typename Singleton<T>::unique_ptr Singleton<T>::instance_;
Somehow this means we have a _instance in our application and
a different _instance inside our dynamic loaded library.
If we look at the unhelpful comment again we should move it to our cpp.
This is possible with a macro. something along the lines of this.
#define DEFINE_SINGLETON_INSTANCE(x) \
    template <> Singleton<x>::unique_ptr Singleton<x>::instance_{}
And each concrete singleton needs to implement this macro in the cpp file.
DEFINE_SINGLETON_INSTANCE(ConcreteSingleton);
Voilà it works as expected.
ConcreteSingleton:
 app=0x123c350 plugin=0x123c350
 value=default get=default
 value=updated value get=updated value
What now?
If anyone can explain the behavior better or why this is the way it is let me know.
A example of the code can be found in this git repository: l33tname/mingelton.
It contains a full CMake setup to reproduce the issue.
The first commit is a working state (with macro) and
the newest commit contains the diff where it fails.
Instructions to build and run can be found inside the README.md.
10 Dec 2022
When you build software at some point you might need a singleton.
Singletons are often a sign of bad software design, but that is not the focus of this blog post.
In software engineering, the singleton pattern is a software design pattern that restricts the instantiation of a class to a singular instance.
(Source: Wikipeda: Singleton pattern)
And good software is using obviously a bunch of singletons.
To ensure that they are all the same we make use of a template.
template <class T> class Singleton
{
  using unique_ptr = std::unique_ptr<T>;

public:
  using element_type = T;
  using deleter_type = typename unique_ptr::deleter_type;

  /// Returns a reference to the single instance, the instance is created if none exists
  static element_type &GetInstance()
  {
    if (not _instance)
    {
      _instance.reset(new element_type{});
    }
    return *_instance;
  }

  /// Releases the single instance and frees its memory
  static void Release() { _instance.reset(); }

protected:
  Singleton() = default;
  virtual ~Singleton() = default;
  Singleton(const Singleton &) = delete;
  Singleton &operator=(const Singleton &) = delete;
  Singleton(const Singleton &&) = delete;
  Singleton &operator=(Singleton &&) = delete;

private:
  static unique_ptr _instance;
};
template <class T> typename Singleton<T>::unique_ptr Singleton<T>::_instance;
This implementation favors simplicity over thread-safety.
If you need a thread-safe implementation don't use this one.
With that template in place it is now super easy to create a new singleton like this:
class ConcreteSingleton : public Singleton<ConcreteSingleton>
{
  // need to be friend to access private constructor/destructor
  friend Singleton<ConcreteSingleton>;
  friend Singleton<ConcreteSingleton>::deleter_type;

public:
  void SomeGreatFunction() const;
  ...

// unless you have a great reason to have a
// public constructor and destructor it should be private
private:
  ConcreteSingleton() { ... some stuff ... }
  ~ConcreteSingleton() = default;
};
If you use that for all singletons in your code they all look uniform.
06 Nov 2022
You might remember my blog posts from 2016 where I documented my dnsmasq setup.
I run a primary setup on NetBSD and a secondary on Debian.
(Checkout the linked blog posts if you are interested)
The reasons and use-cases are still the same but this time I gave NixOS a chance since
it was time to upgrade the Debian installation.
It was surprisingly easy after a few start hurdles, where I struggled to get any output on my 4k display.
Using a older 1080p monitor solved that for me.
Getting started
Since I used a Raspberry Pi 3 I could use the latest AArch64 image from Hydra (source: https://wiki.nixos.org/wiki/NixOS_on_ARM#Installation).
In my case that was the release-22.05 https://hydra.nixos.org/job/nixos/release-22.05/nixos.sd_image.aarch64-linux.
Unpacking and flashing this image to the SD Card works the same as with all other Raspberry Pi images.
Make sure you flash it to the correct device!
wget https://hydra.nixos.org/build/197683332/download/1/nixos-sd-image-22.05.3977.f09ad462c5a-aarch64-linux.img.zst
unzstd nixos-sd-image-22.05.3977.f09ad462c5a-aarch64-linux.img.zst
cat unzstd nixos-sd-image-22.05.3977.f09ad462c5a-aarch64-linux.img > /dev/sdX
After doing this it should be possible to boot up NixOS for the first time.
Basics
Start with generating a basic configuration with:
sudo nixos-generate-config
Lets add a user and some packages (vim and ping) which I want to have on my new system.
# Define a user account. Don't forget to set a password with ‘passwd’.
users.users.l33tname = {
 isNormalUser = true;
 extraGroups = [ "wheel" ]; # Enable ‘sudo’ for the user.
};

# List packages installed in system profile. To search, run:
# $ nix search wget
environment.systemPackages = with pkgs; [
 vim
 inetutils # ping
];
Network
The networking is a bit more involved.
I need a static IPv4 and IPv6.
Default routes and DNS server.
Very straight forward after I understood the concept.
networking.useDHCP = false;
networking.interfaces.eth0 = {
useDHCP = false;
ipv4.addresses = [
    { address = "192.168.17.7"; prefixLength = 24; }
];
ipv6.addresses = [
    { address = "2001:XXXX:XXXX::7"; prefixLength = 64; }
];
};
networking.defaultGateway = { address = "192.168.17.1"; interface = "eth0"; };
networking.defaultGateway6 = { address = "2001:XXXX:XXXX::1"; interface = "eth0"; };
networking.nameservers = [ "127.0.0.1" "8.8.8.8.8" ];
Dnsmasq
UPDATE: take a look at the update configuration
for NixOS 23.05 where i fetch the hosts file from a url.
Last the main event to configure my dnsmasq server the same way I did on my Debian.
And as you can see from the config I just created a hosts.txt
file which will be merged with /etc/hosts.
(I am thinking about fetching this file from a local webserver or git repo)
# List services that you want to enable:
networking.hostFiles = [ /etc/nixos/hosts.txt ];
services.dnsmasq.enable = true;
services.dnsmasq.alwaysKeepRunning = true;
services.dnsmasq.servers = [ "85.214.73.63" "208.67.222.222" "62.141.58.13" ];
services.dnsmasq.extraConfig = "cache-size=500";
Putting it all together
This gives me a config which looks something like this:
{ config, pkgs, ... }:
{
  imports =
    [ # Include the results of the hardware scan.
      ./hardware-configuration.nix
    ];

  # Use the extlinux boot loader. (NixOS wants to enable GRUB by default)
  boot.loader.grub.enable = false;
  # Enables the generation of /boot/extlinux/extlinux.conf
  boot.loader.generic-extlinux-compatible.enable = true;

  networking.hostName = "nixos"; # Define your hostname.
  # Pick only one of the below networking options.
  # networking.wireless.enable = true;  # Enables wireless support via wpa_supplicant.
  # networking.networkmanager.enable = true;  # Easiest to use and most distros use this by default.

  # Set your time zone.
  time.timeZone = "Europe/Zurich";

  # Select internationalisation properties.
  i18n.defaultLocale = "en_US.UTF-8";

  # Define a user account. Don't forget to set a password with ‘passwd’.
  users.users.l33tname = {
     isNormalUser = true;
     extraGroups = [ "wheel" ]; # Enable ‘sudo’ for the user.
  };

  # List packages installed in system profile. To search, run:
  # $ nix search wget
  environment.systemPackages = with pkgs; [
     vim
     inetutils # ping
  ];

  networking.useDHCP = false;
  networking.interfaces.eth0 = {
    useDHCP = false;
    ipv4.addresses = [
        { address = "192.168.17.7"; prefixLength = 24; }
    ];
    ipv6.addresses = [
        { address = "2001:XXXX:XXXX::7"; prefixLength = 64; }
    ];
  };
  networking.defaultGateway = { address = "192.168.17.1"; interface = "eth0"; };
  networking.defaultGateway6 = { address = "2001:XXXX:XXXX::1"; interface = "eth0"; };
  networking.nameservers = [ "127.0.0.1" "8.8.8.8" ];

  # List services that you want to enable:
  networking.hostFiles = [ /etc/nixos/hosts.txt ];
  services.dnsmasq.enable = true;
  services.dnsmasq.alwaysKeepRunning = true;
  services.dnsmasq.servers = [ "85.214.73.63" "208.67.222.222" "62.141.58.13" ];
  services.dnsmasq.extraConfig = "cache-size=500";


  # Enable the OpenSSH daemon.
  services.openssh.enable = true;
}
After that we can build and install this config.
It helps to set a password for the newly created account.
sudo nixos-rebuild switch
passwd l33tname
After a reboot lets see if everything booted correctly and
you can login over ssh with the new user.
Misc
Over all it was a pleasant experience to setup NixOS.
I think to keep it up to date I will run nixos-rebuild switch --upgrade from time to time.
A thing I used a bunch is the options search from NixOS at:
https://search.nixos.org/options to read the docs for config keys or
finding the correct config key.
Last but not least I want to point to these four resources which helped me to understand how to configure my system.
27 Aug 2022
I planned to write this blog posts ~2 years ago.
But for some reason I never did.
It is about how I mounted my router (see: hEX S The Good The Bad The Ugly),
and my primary and secondary Raspberry Pi running DNS (see: DNS Server on NetBSD and DNS Server on Debian).
Iteration 1
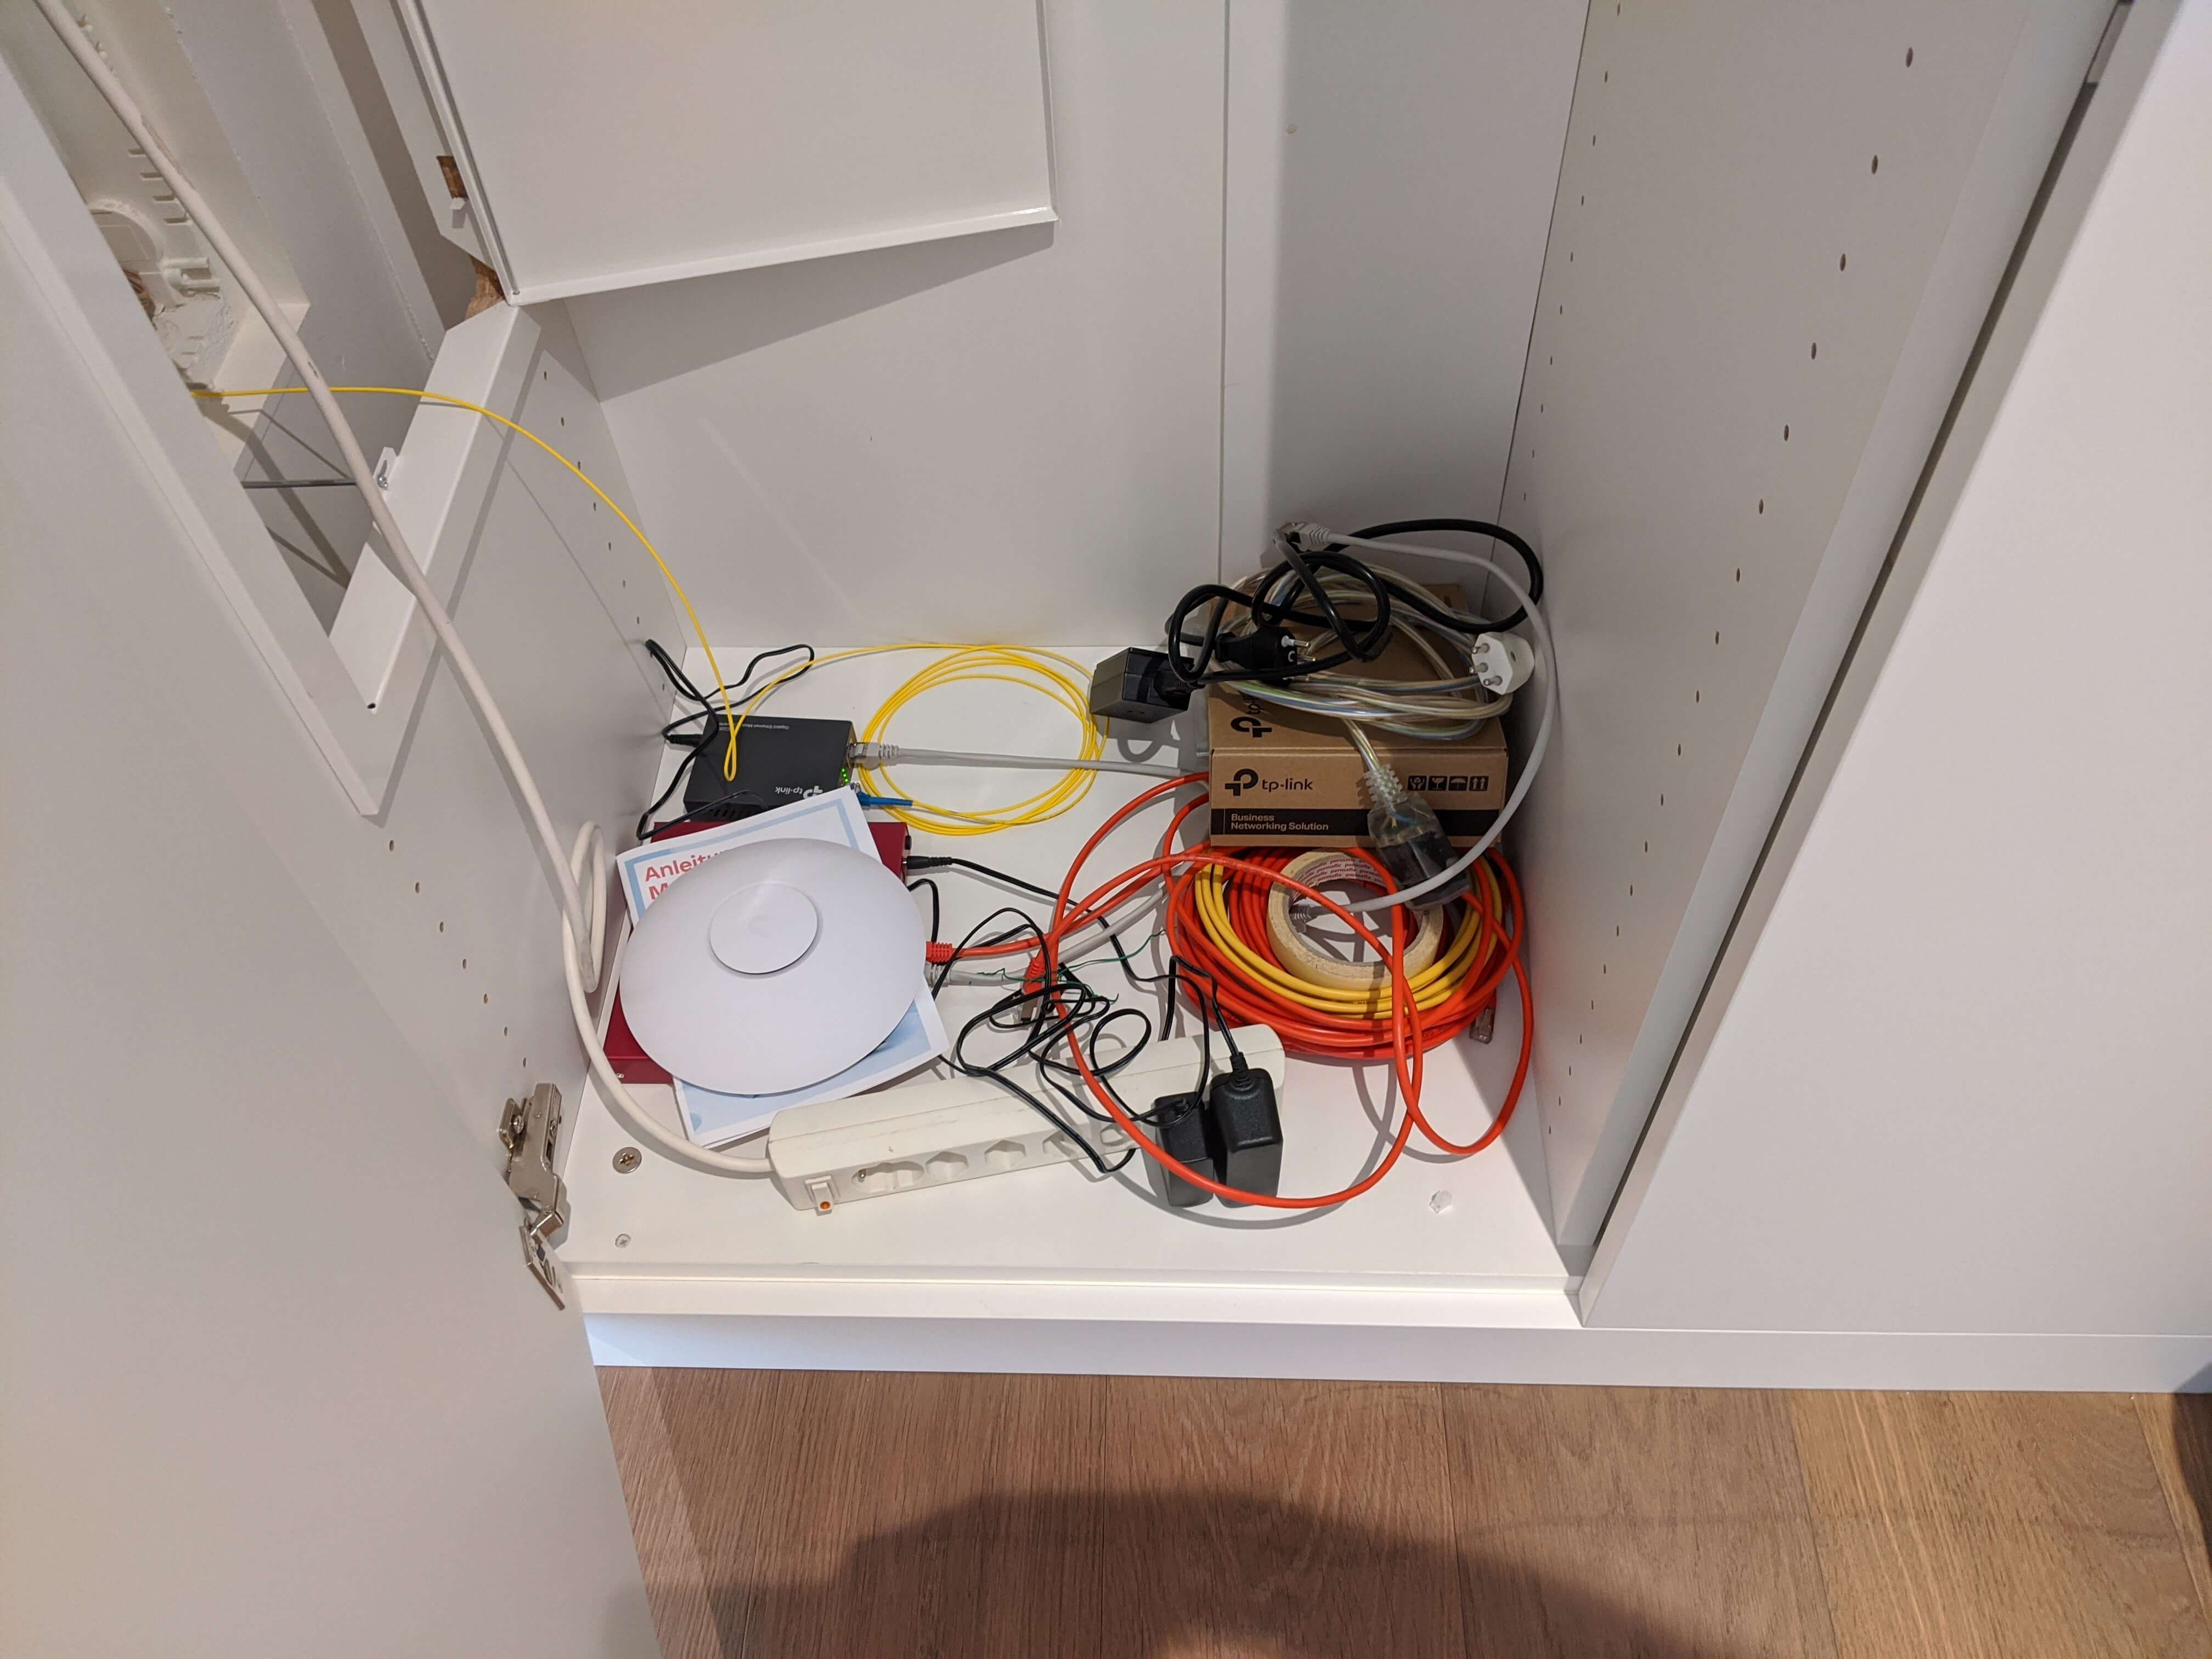
As you can see the first iteration of this setup was just to dump all the devices on the ground and get them running.
This was even before I switched to the hEX S router.

Iteration 2
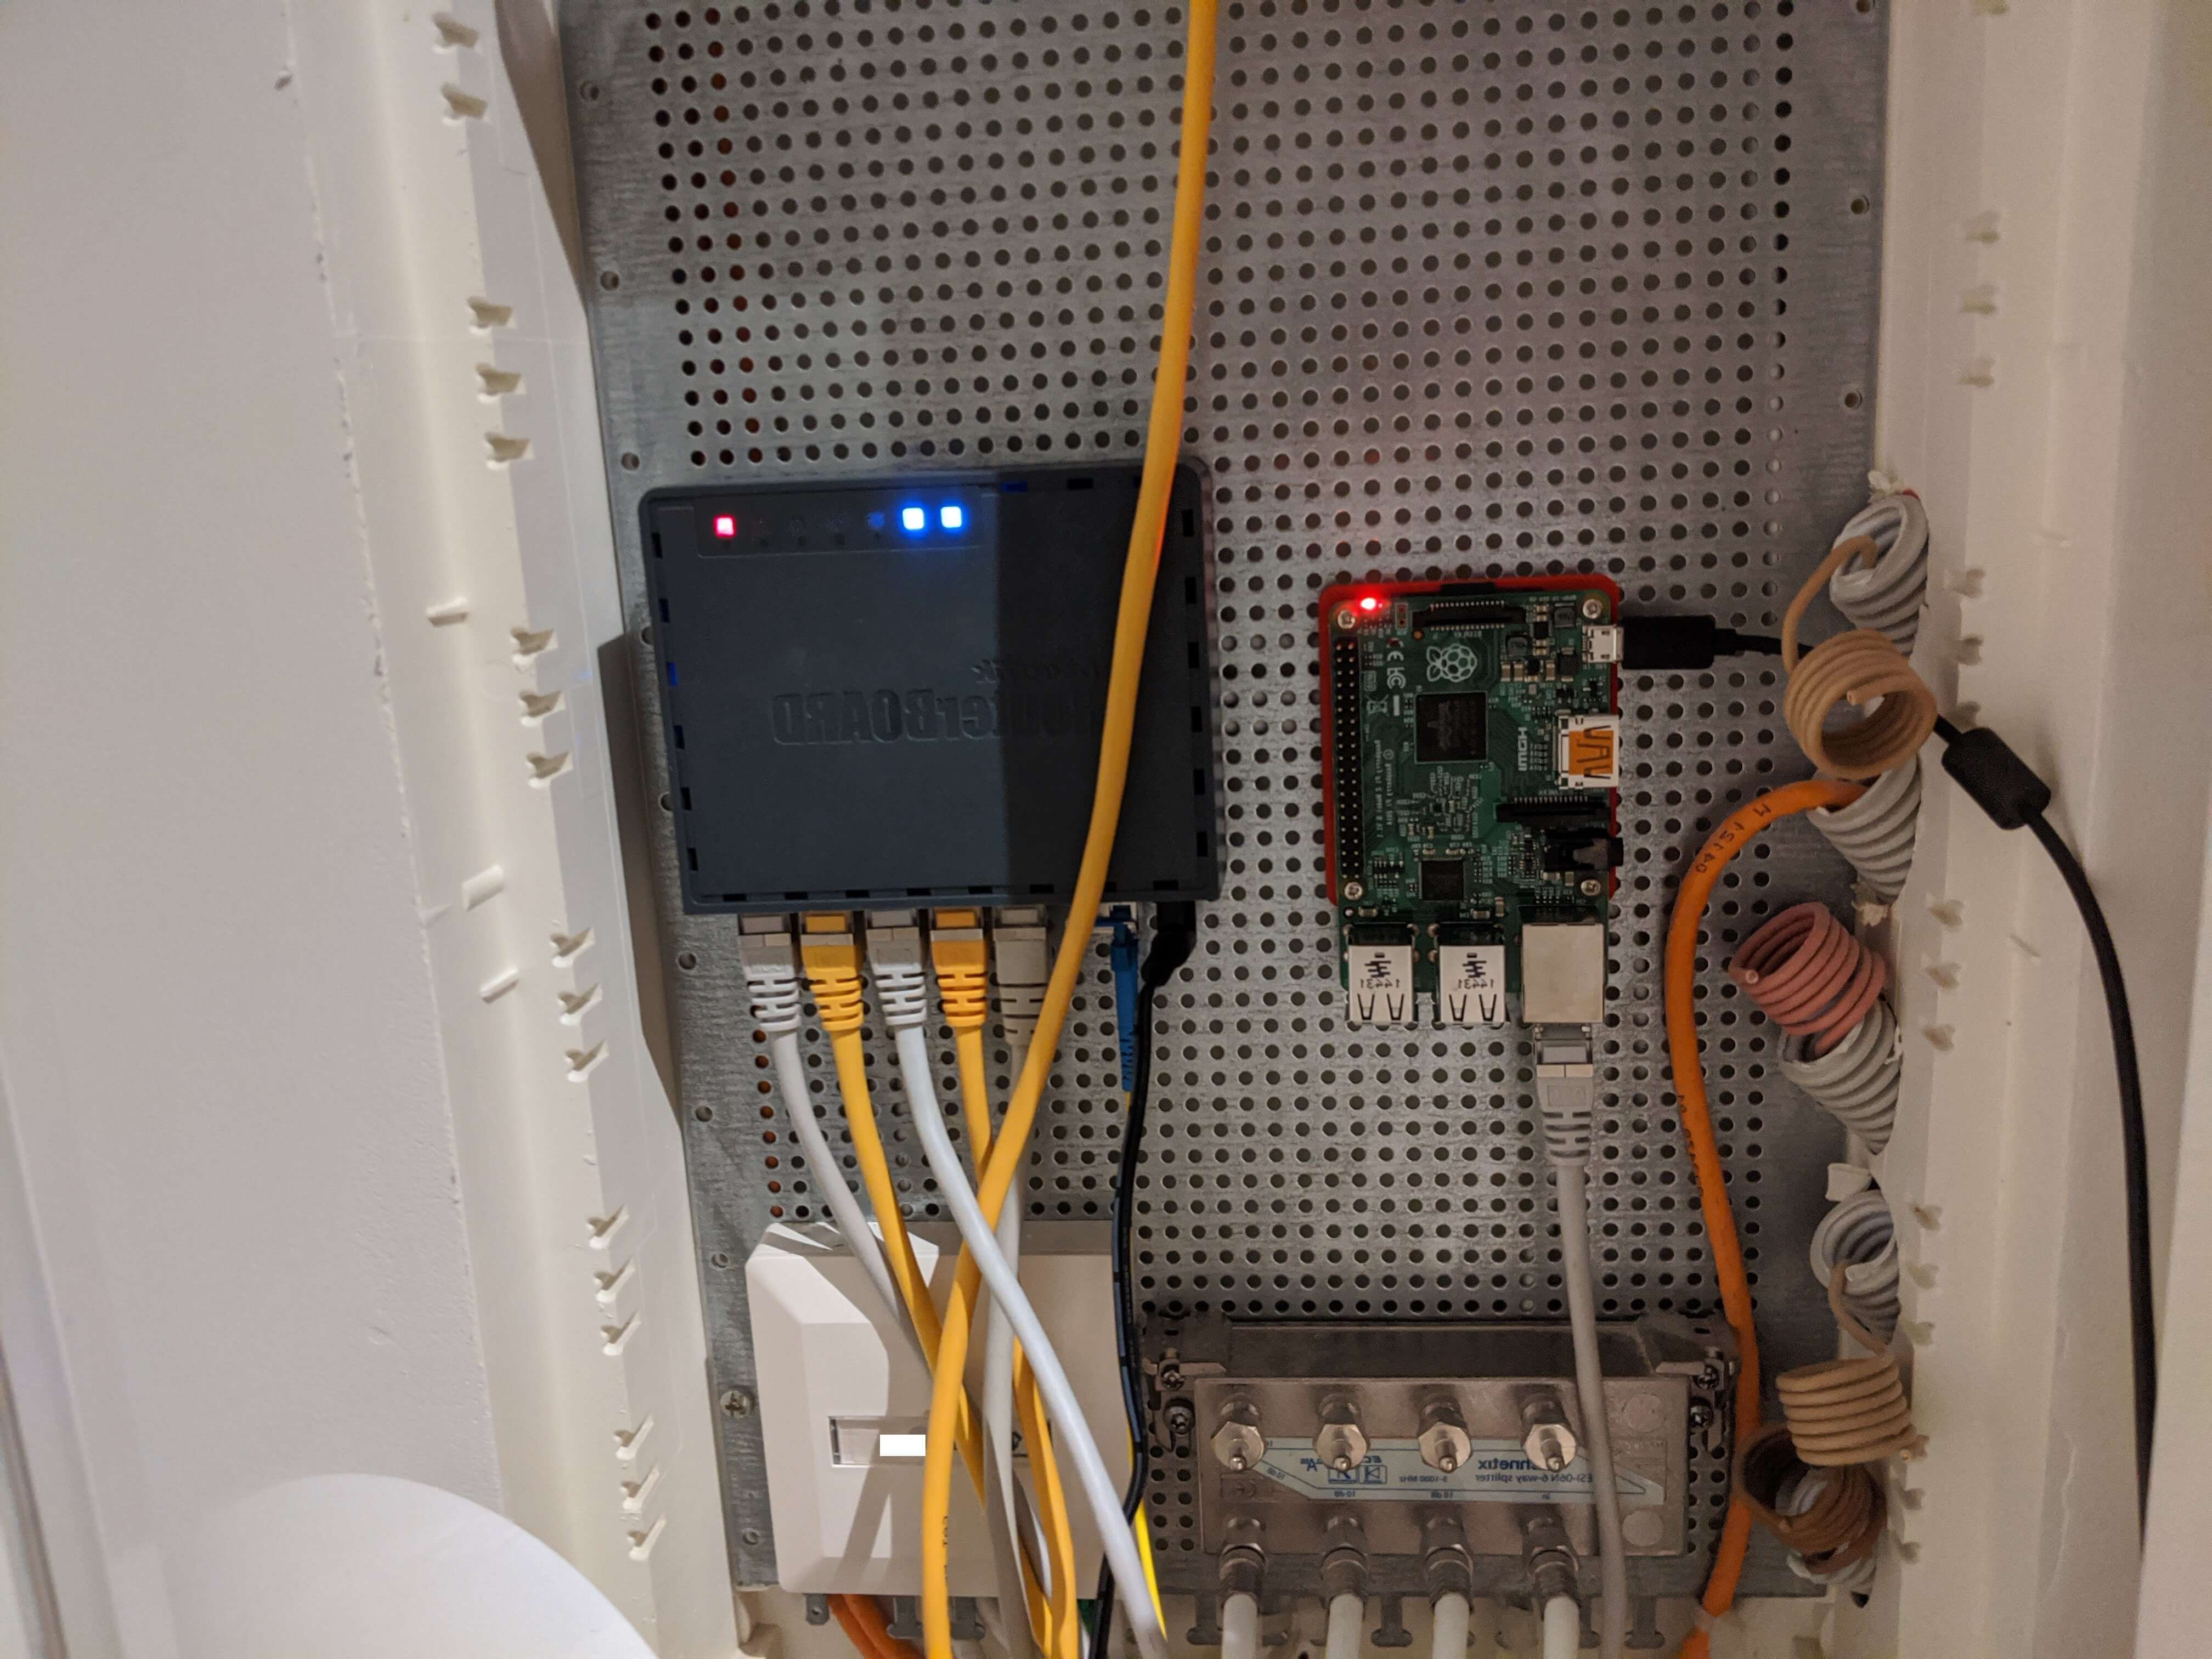
The next step was to figure out how to mount my devices to the perforated mounting plate (Montageblech, gelocht, verzinkt).
For the hEX S this was simple, as Mikrotik (the manufacturer of the devices) states:
This device is designed for use indoors by placing it on the flat surface or mounting on the wall,
mounting points are located on the bottom side of the device, screws are not included in the package.
Screws with size 4x25 mm fit nicely.
But what about the Raspberry Pi?
Let's 3D print something I found a great Raspberry Pi Wall Mount
where I adapted the mount to fit the distance between the two screw holes.

I googeled that the correct screws are Blechschrauben 4.2x9.5mm.
Since you can not buy just a handful of these I own now a 100 of them.
(If you know me, and need these screws for something let me know)
For some reason they are awful to work with or I was holding it wrong.
They don't work to mount the router because the screw head does not fit the
hEX S mounting on the back.
And I could not really screw them into the plate.
I ended up just using random screws I had from things to make it happen.
Which brings us to the next iteration:

Iteration 3
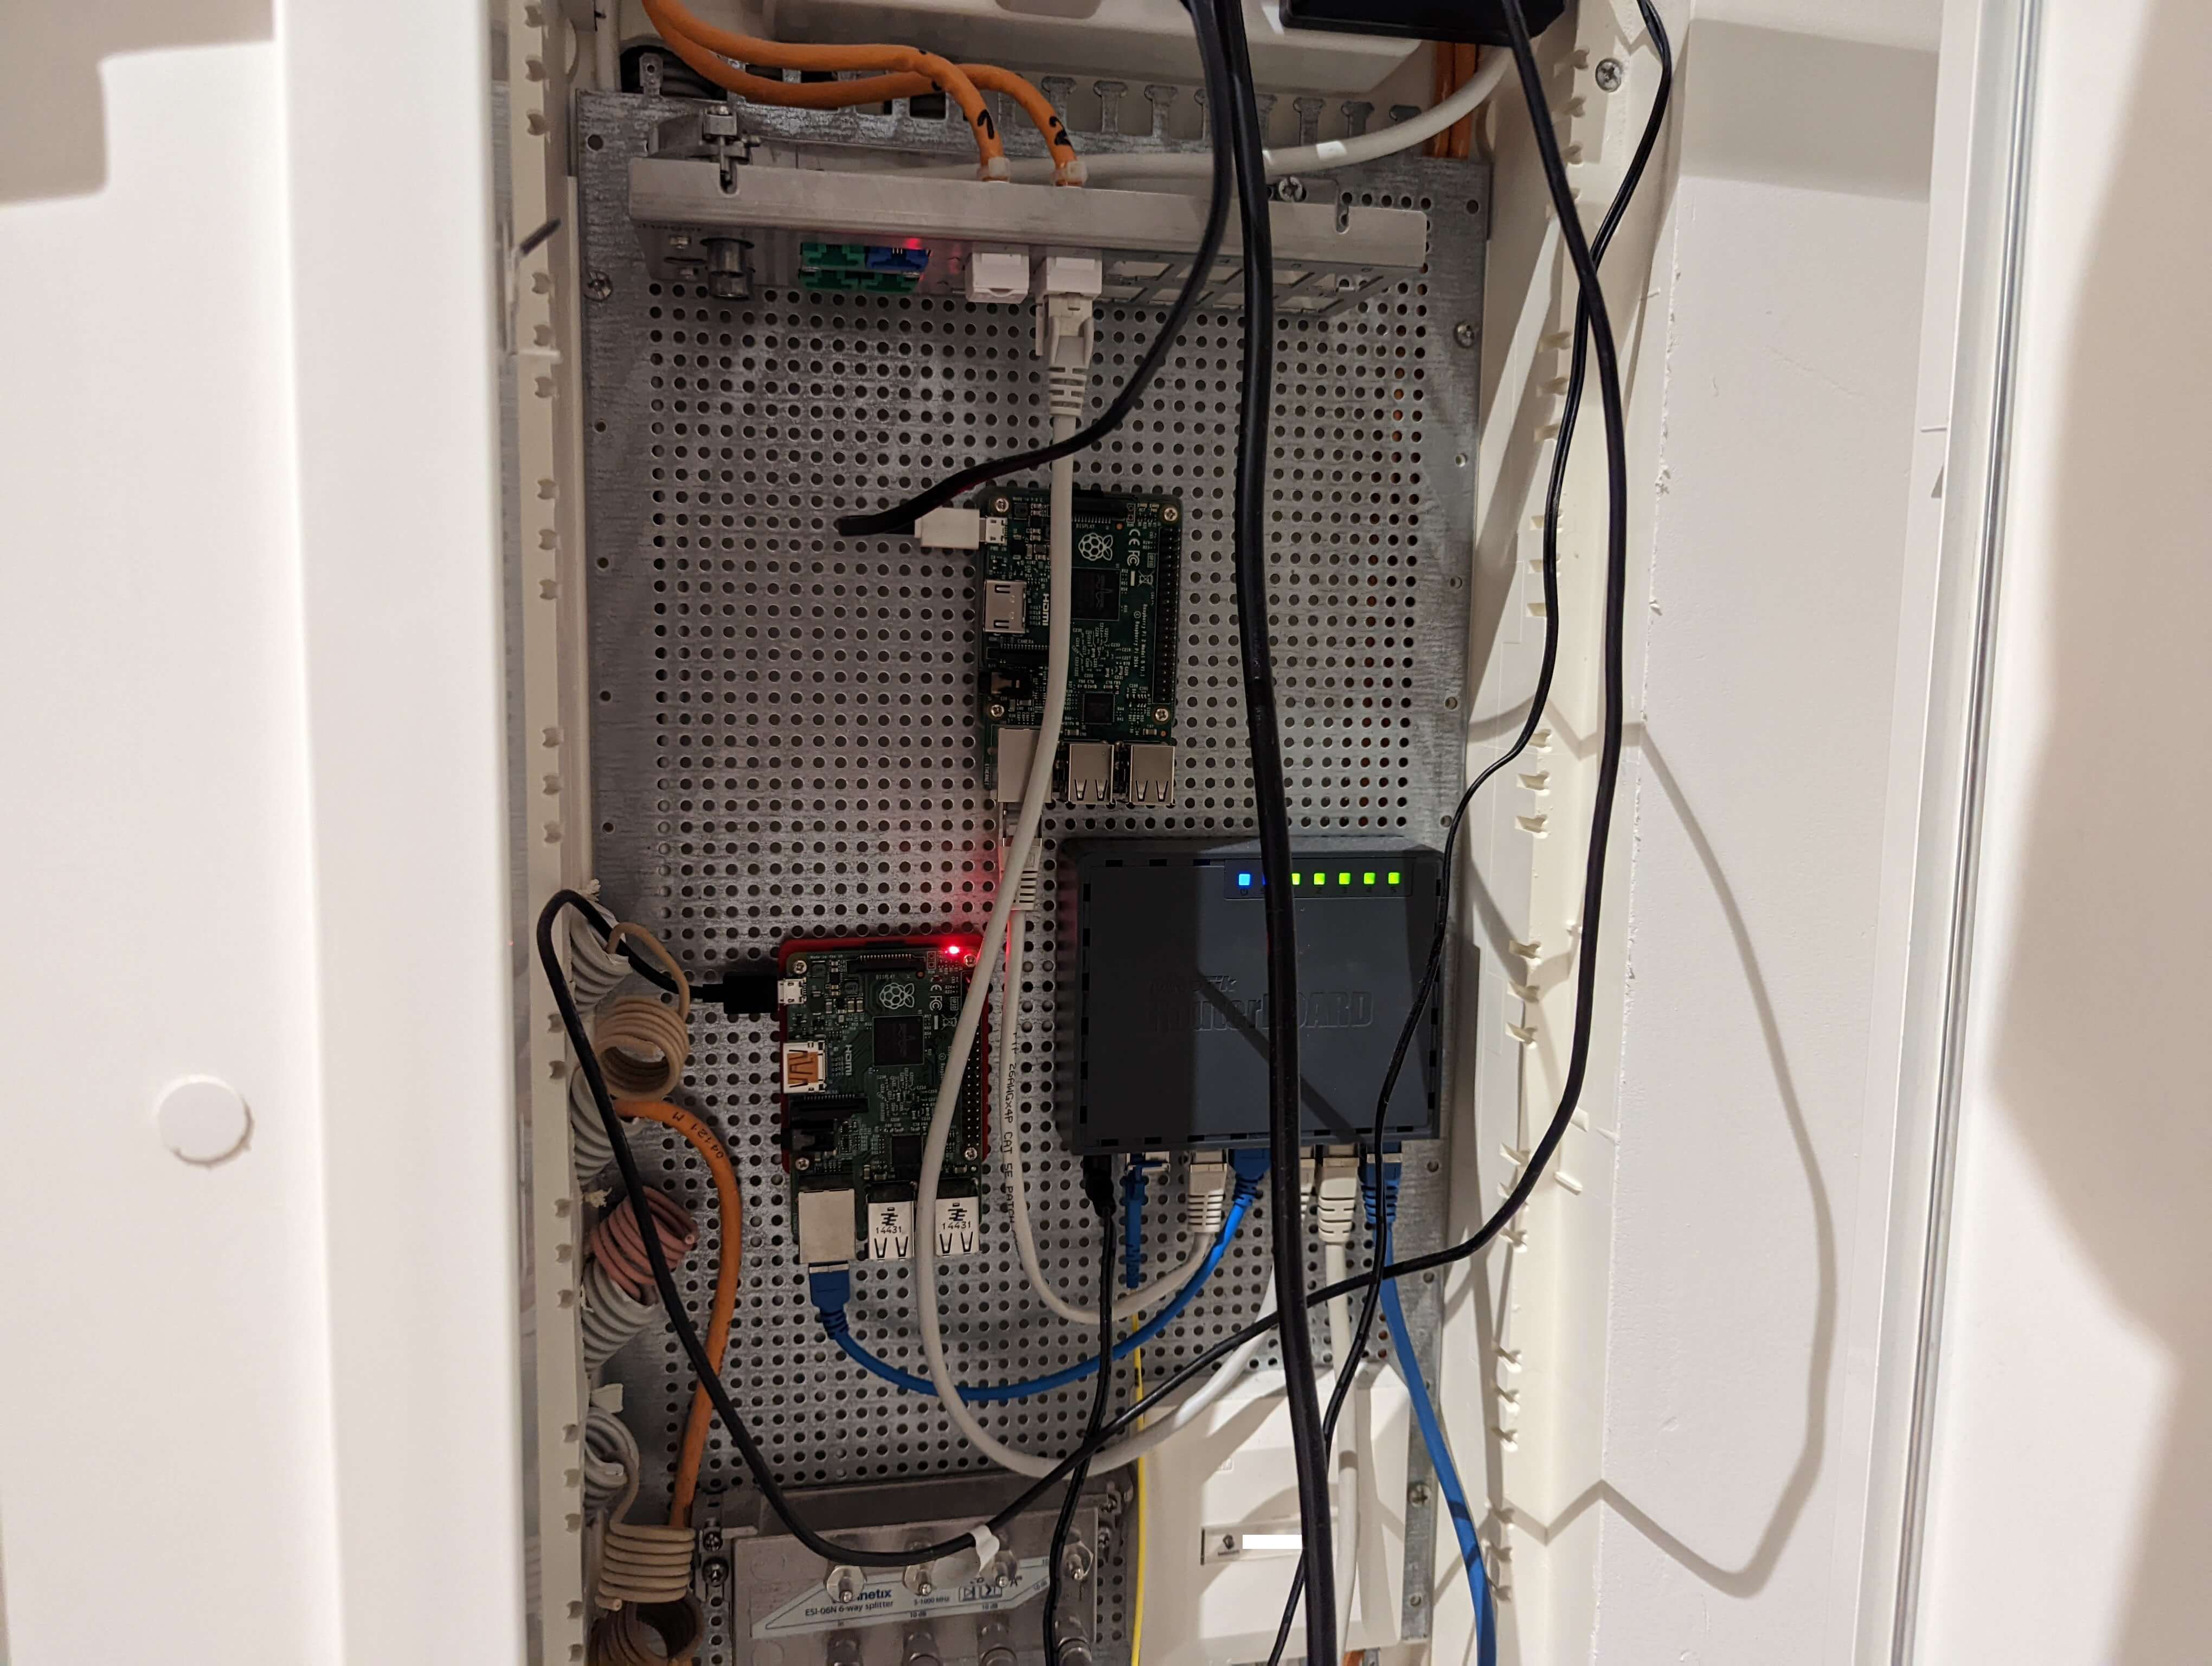
And since then I improved the cable management a bit and
also mounted the second Raspberry Pi.
Which gives us the current state:


